Captcha is use to prevent bots and spam while submitting online forms. reCAPTCHA is a free service by Google that protects your website from spam and abuse without ugly curved texts and numbers but with additional security of Google.
CAPTCHA stands for “Completely Automated Public Turing Test To Tell Computers and Humans Apart”. In short, it allows you to protect your registration page against automatic bots.
In traditional CAPTCHA, which is a randomly generated string that appears when verification is required before submitting any online form. It is an essential requirement for cutting down the spam at a website. In many cases, it is the only line of defense a website has against bots that spam websites.
Codeigniter is great when we consider about security of the PHP application. It comes with lot of security features build in including CAPTCHA.
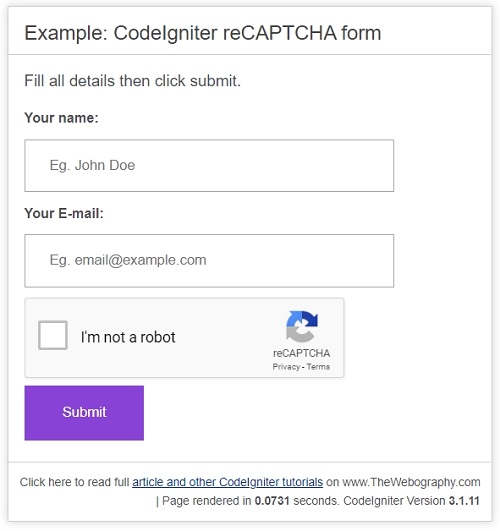
Codeigniter has a helper to handle CAPTCHA functionality but in this tutorial we will implement Google reCAPTCHA instead of build-in CAPTCHA.
Step 1: Google reCAPTCHA API Registration
We need to have API key and secret key to use Google reCAPTCHA. So firstly we need to create one. You need Google account for this process. Visit Google reCAPTCHA page to create API keys.
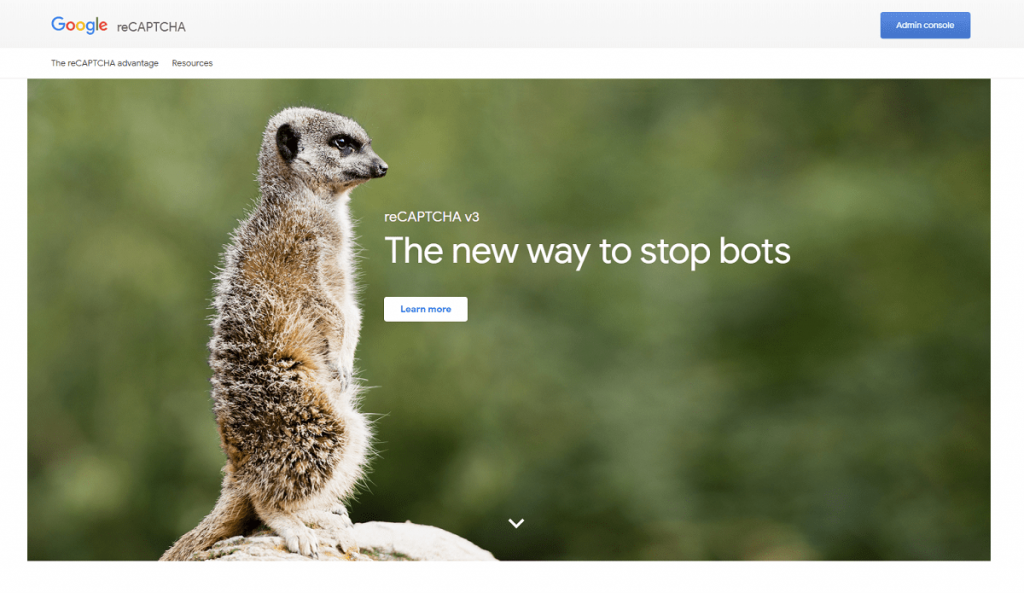
Click Admin Console button from top right corner then login with your existing Google account or create new account.

Click + button from top right corner of the console panel which will register your website to use reCAPTCHA.
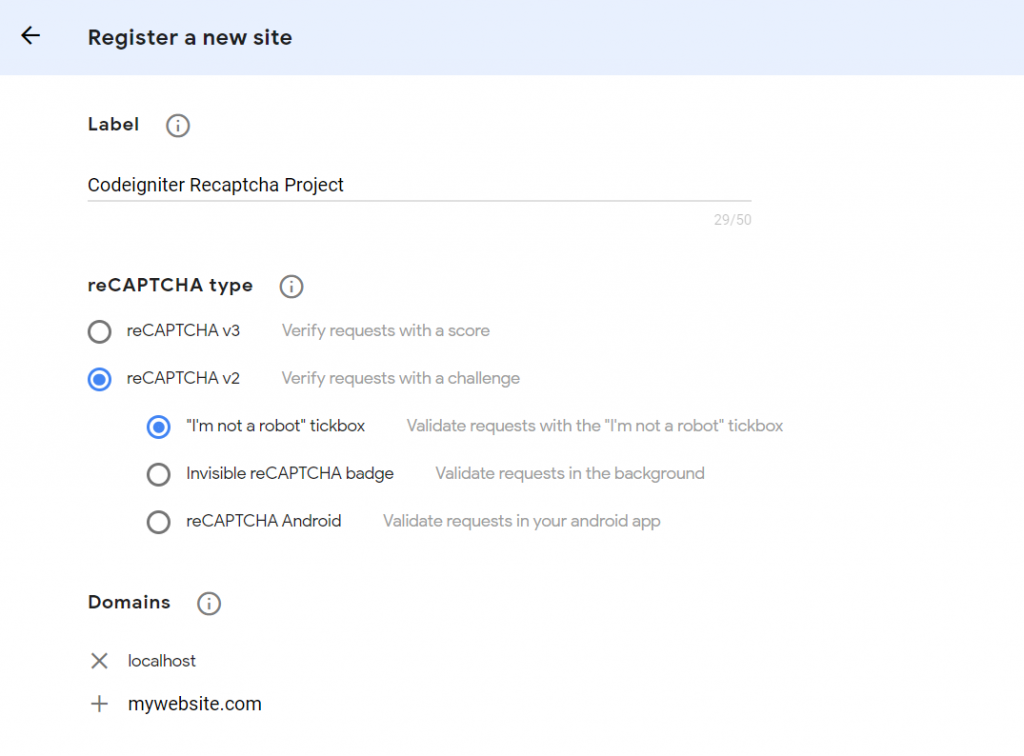
Fill all details and choose reCAPTCHA V2 as reCAPTCHA type because reCAPTCHA V2 is has “I’m not a robot” tickbox option. In domain section you have to add domains where your application gonna host. ReCAPTCHA will work on this domain only.
If you enter “abc.com” as your domain and trying to use this reCAPTCHA keys in “xyz.com” then it won't work.
You can use multiple domain name. I registered localhost as domain because I need to test it on my local web server.
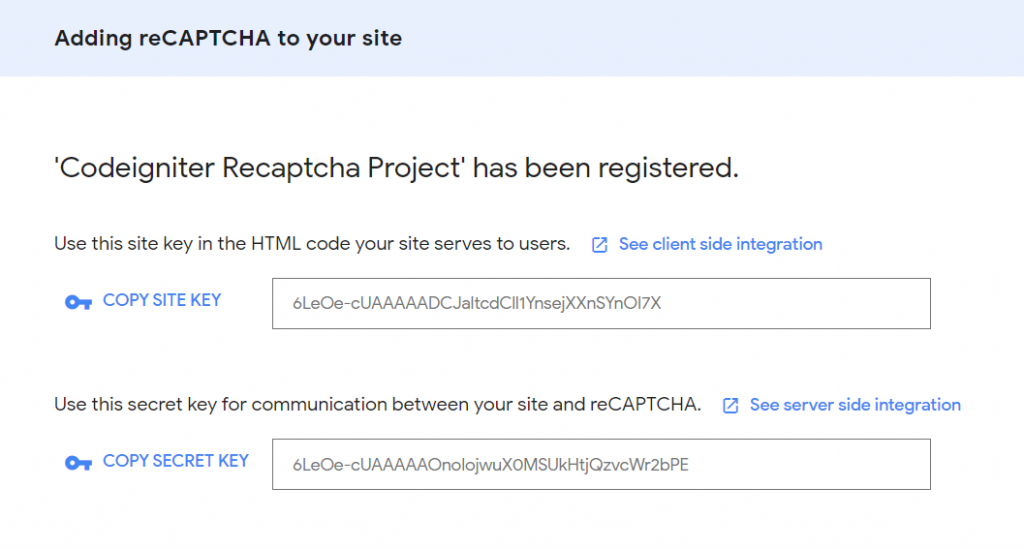
You will get your site key and secret key. We need these keys later.
Step 2 : Download Codeigniter
First of all you need to download Codeigniter and setup as a new project. I used CodeIgniter 3.1.11 which is latest till now. You can implement reCAPTCHA into existing project also, but for more easy to understand, i created an new project and named as recaptcha. Now folder structure will be look like this.
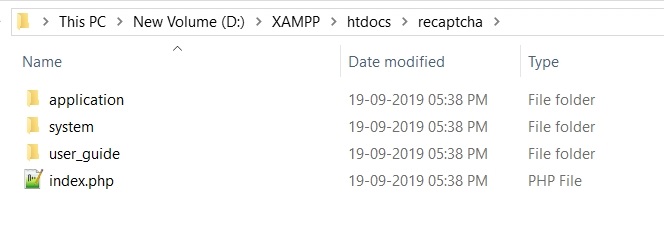
Step 3: Setup Codeigniter
We need to configure our Codeigniter application according to our requirements. Open config.php file with text editor which is located on application/config/config.php directory.
Set base_url like this
$config['base_url'] = 'http://localhost/recaptcha/';Step 4: reCAPTCHA Library for Codeigniter
We are going to create a library which will extend our php application to support reCAPTCHA. Create Recaptcha.php inside application/libraries folder then paste this PHP code inside file.
Below is the complete library code.
//application/libraries/Recaptcha.php
<?php (! defined('BASEPATH')) and exit('No direct script access allowed');

class Recaptcha
{
    private $_ci;
    const sign_up_url = 'https://www.google.com/recaptcha/admin';
    const site_verify_url = 'https://www.google.com/recaptcha/api/siteverify';
    const api_url = 'https://www.google.com/recaptcha/api.js';

    public function __construct()
    {
        $this->_ci = & get_instance();
        $this->_ci->load->config('recaptcha');
        $this->_siteKey = $this->_ci->config->item('recaptcha_site_key');
        $this->_secretKey = $this->_ci->config->item('recaptcha_secret_key');
        $this->_language = $this->_ci->config->item('recaptcha_lang');
        if (empty($this->_siteKey) or empty($this->_secretKey)) {
            die("To use reCAPTCHA you must get an API key from <a href='"
                .self::sign_up_url."'>".self::sign_up_url."</a>");
        }
    }
    /**
     * Submits an HTTP GET to a reCAPTCHA server.
     *
     * @param array $data array of parameters to be sent.
     *
     * @return array response
     */
    private function _submitHTTPGet($data)
    {
        $url = self::site_verify_url.'?'.http_build_query($data);
        $response = file_get_contents($url);
        return $response;
    }
    /**
     * Calls the reCAPTCHA siteverify API to verify whether the user passes
     * CAPTCHA test.
     *
     * @param string $response response string from recaptcha verification.
     * @param string $remoteIp IP address of end user.
     *
     * @return ReCaptchaResponse
     */
    public function verifyResponse($response, $remoteIp = null)
    {
        $remoteIp = (!empty($remoteIp)) ? $remoteIp : $this->_ci->input->ip_address();
        // Discard empty solution submissions
        if (empty($response)) {
            return array(
                'success' => false,
                'error-codes' => 'missing-input',
            );
        }
        $getResponse = $this->_submitHttpGet(
            array(
                'secret' => $this->_secretKey,
                'remoteip' => $remoteIp,
                'response' => $response,
            )
        );
        // get reCAPTCHA server response
        $responses = json_decode($getResponse, true);
        if (isset($responses['success']) and $responses['success'] == true) {
            $status = true;
        } else {
            $status = false;
            $error = (isset($responses['error-codes'])) ? $responses['error-codes']
                : 'invalid-input-response';
        }
        return array(
            'success' => $status,
            'error-codes' => (isset($error)) ? $error : null,
        );
    }
    /**
     * Render Script Tag
     *
     * onload: Optional.
     * render: [explicit|onload] Optional.
     * hl: Optional.
     * see: https://developers.google.com/recaptcha/docs/display
     *
     * @param array parameters.
     *
     * @return scripts
     */
    public function getScriptTag(array $parameters = array())
    {
        $default = array(
            'render' => 'onload',
            'hl' => $this->_language,
        );
        $result = array_merge($default, $parameters);
        $scripts = sprintf('<script type="text/javascript" src="%s?%s" async defer></script>',
            self::api_url, http_build_query($result));
        return $scripts;
    }
    /**
     * render the reCAPTCHA widget
     *
     * data-theme: dark|light
     * data-type: audio|image
     *
     * @param array parameters.
     *
     * @return scripts
     */
    public function getWidget(array $parameters = array())
    {
        $default = array(
            'data-sitekey' => $this->_siteKey,
            'data-theme' => 'light',
            'data-type' => 'image',
            'data-size' => 'normal',
        );
        $result = array_merge($default, $parameters);
        $html = '';
        foreach ($result as $key => $value) {
            $html .= sprintf('%s="%s" ', $key, $value);
        }
        return '<div class="g-recaptcha" '.$html.'></div>';
    }
}
Step 5: Setup config and API Keys
Create recaptcha.php file inside application/config folder. Place these PHP codes inside file with reCAPTCHA Site key and secret key.
<?php defined('BASEPATH') OR exit('No direct script access allowed');

$config['recaptcha_site_key'] = 'RECAPTCHA SITE KEY';
$config['recaptcha_secret_key'] = 'RECAPTCHA SECRET KEY';
// reCAPTCHA supported 40+ languages listed here: https://developers.google.com/recaptcha/docs/language
$config['recaptcha_lang'] = 'en';
Step 6: Create Controller
Codeigniter is a PHP MVC framework. We need to create controller file to handle functions and methods.
Create Recaptcha_form.php inside application/controllers folder.
We will load some of inbuilt Libraries and Helpers to use form validation, flashdata and some url functions.
$this->load->library('form_validation');
$this->load->library('session');
$this->load->helper('url');
The whole controller will be look like below syntax.
<?php defined('BASEPATH') OR exit('No direct script access allowed');

class Recaptcha_form extends CI_Controller {
	public function __construct()
	{
		parent::__construct();

		$this->load->library('form_validation');
		$this->load->library('recaptcha');
		$this->load->library('session');
		$this->load->helper('url');


	}
	public function index()
	{

		$this->form_validation->set_rules('name', 'Name', 'required|trim');
		$this->form_validation->set_rules('email', 'E-mail', 'required|trim|valid_email');
		$this->form_validation->set_rules('g-recaptcha-response', 'I\'m not a robot', 'required|callback_recaptcha_response_check');

		if ($this->form_validation->run() === TRUE)
		{
			$success_message = '<div class="form-response-box">';
			$success_message .= '<h2>Thank you for your response. We have recorded following details.</h2>';
			$success_message .= '<strong> Name: </strong>'. $this->input->post('name').'<br>';
			$success_message .= '<strong> E-Mail: </strong>'. $this->input->post('email').'<br>';
			$success_message .= '<strong> reCAPTCHA Response code: </strong>'. $this->input->post('g-recaptcha-response').'<br>';
			$success_message .= '</div>';

			$this->session->set_flashdata('message', $success_message);
			redirect('Recaptcha_form', 'refresh');

		}
		else
		{

			$this->load->view('form');

		}
	}
	public function recaptcha_response_check($recaptcha_response)
    {
		if (!empty($recaptcha_response)) {
			$response = $this->recaptcha->verifyResponse($recaptcha_response);
			if (isset($response['success']) and $response['success'] === true)
			{
				return TRUE;
			}
			else
			{
				$this->form_validation->set_message('recaptcha_check', '{field} must be veryfied.');
				return FALSE;
			}
		}
    }
}
Step 7: Create View
After creating controller, we need view file to set application output. We will create form and other elements in view file.
Create form.php inside application/views directory
We added reCAPTCHA widget and scripts inside our view file.
The whole syntax will look like this.
<?php defined('BASEPATH') OR exit('No direct script access allowed'); ?>
<!DOCTYPE html>
<html lang="en">
<head>
	<meta charset="utf-8">
	<title>reCAPTCHA for CodeIgniter</title>
	<style type="text/css">
	::selection { background-color: #E13300; color: white; }
	::-moz-selection { background-color: #E13300; color: white; }
	body {
		background-color: #fff;
		margin: 40px;
		font: 13px/20px normal Helvetica, Arial, sans-serif;
		color: #4F5155;
	}
	a {
		color: #003399;
		background-color: transparent;
		font-weight: normal;
	}
	h1 {
		color: #444;
		background-color: transparent;
		border-bottom: 1px solid #D0D0D0;
		font-size: 19px;
		font-weight: normal;
		margin: 0 0 14px 0;
		padding: 14px 15px 10px 15px;
	}
	code {
		font-family: Consolas, Monaco, Courier New, Courier, monospace;
		font-size: 12px;
		background-color: #f9f9f9;
		border: 1px solid #D0D0D0;
		color: #002166;
		display: block;
		margin: 14px 0 14px 0;
		padding: 12px 10px 12px 10px;
	}
	.heading{
		font-size: 15px;
	}
	#body {
		margin: 0 15px 0 15px;
	}
	p.footer {
		text-align: right;
		font-size: 11px;
		border-top: 1px solid #D0D0D0;
		line-height: 32px;
		padding: 0 10px 0 10px;
		margin: 20px 0 0 0;
	}
	#container {
		margin: 10px;
		border: 1px solid #D0D0D0;
		box-shadow: 0 0 8px #D0D0D0;
	}
	label {

		display:block;
		font-weight: bold;
	}
	input[type=text] {

		display:block;
		width: 350px;
		padding: 15px 22px;
		margin: 10px 0;
		box-sizing: border-box;
	}

	input[type=submit] {

		display:block;
		background-color: #8842d5;
		border: none;
		color: white;
		padding: 18px 36px;
		text-decoration: none;
		margin: 5px 0;
		cursor: pointer;
	}
	.error-msg{
		color: red;
		display:block;
		margin-bottom: 10px;
	}
	.form-response-box {
		display:block;
		margin: 20px 0;
		padding: 20px;
		border: 2px solid #4CAF50
	}
	.form-response-box h2 {
		display: block;
		color: #4CAF50;
		font-size: 19px;
		font-weight: normal;
		margin: 10px 0;
	}
	</style>
</head>
<body>
<div id="container">
	<h1>Example: CodeIgniter reCAPTCHA form</h1>
	<div id="body">
	<?php if ($this->session->has_userdata('message') == true) {?>

		<?php echo $this->session->flashdata('message');?>

	<?php }?>

		<p class="heading">Fill all details then click submit. Click here for full <a href="user_guide/">article</a>.</p>


		<form method="post" action="<?php echo site_url('Recaptcha_form');?>">

		<label for="name">Your name:</label>
		<input type="text" id="name" name="name" placeholder="Eg. John Doe">
		<?php echo form_error('name','<span class="error-msg">','</span>');?>

		<label for="email">Your E-mail:</label>
		<input type="text" id="email" name="email" placeholder="Eg. email@example.com">
		<?php echo form_error('email','<span class="error-msg">','</span>');?>

		<?php echo $this->recaptcha->getWidget(); ?>
		<?php echo $this->recaptcha->getScriptTag(); ?>
		<?php echo form_error('g-recaptcha-response','<span class="error-msg">','</span>');?>

		<input type="submit" value="Submit">

		<form>


	</div>
	<p class="footer">Page rendered in <strong>{elapsed_time}</strong> seconds. <?php echo  (ENVIRONMENT === 'development') ?  'CodeIgniter Version <strong>' . CI_VERSION . '</strong>' : '' ?></p>
</div>
</body>
</html>
Conclusion
Here we made application with Google reCAPTCHA in very minimal time. You can browse application using following URL
http://localhost/recaptcha/index.php/recaptcha_form
If you want to learn how to remove index.php from Codeigniter URL. Here is a step by step tutorial to remove index.php from Codeigniter URL.
If you liked this article, then please subscribe to our YouTube Channel for useful videos. You can also find us on Twitter and Facebook.





Write a Reply or Comment